Sunday, October 23, 2011
French Onion Dip
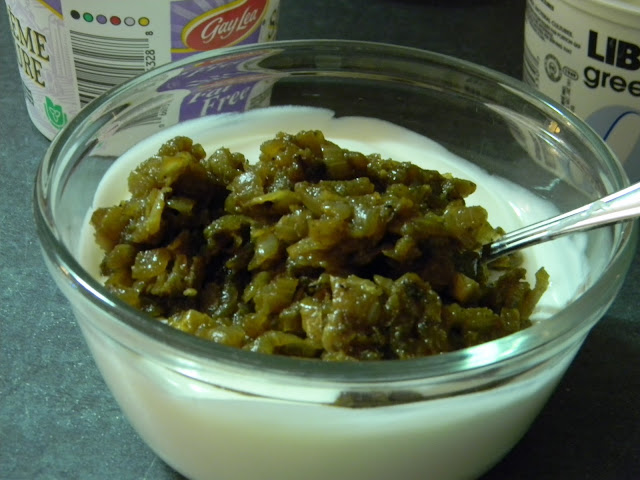
We love, Love, LOVE our chip and dip. And since it's just not that healthy for you......say what?......that's right, I hate to break it to you chip and dip lovers, but it's not. Being high in both fat and salt, it is always nice to come across a healthier version. I found this version of French Onion Dip from Eating Well Magazine and just had to try it. It lowers the fat by 12 grams and the salt by 50% per serving. Have this with the microwave or baked chips, okay even veggies and your sitting pretty guilt free. I made it for Stevie and I to try last night for our usual chip, dip and TCM movie night and it passed with flying colours! This will now be my go to dip recipe. It tastes awesome!
Here's what you will need:
(Printable Recipe)
1 tbsp. olive oil
4 cups chopped onions
1/2 tsp. salt
14 oz. low sodium beef broth
2 tsp. onion powder
2 tbsp. white vinegar
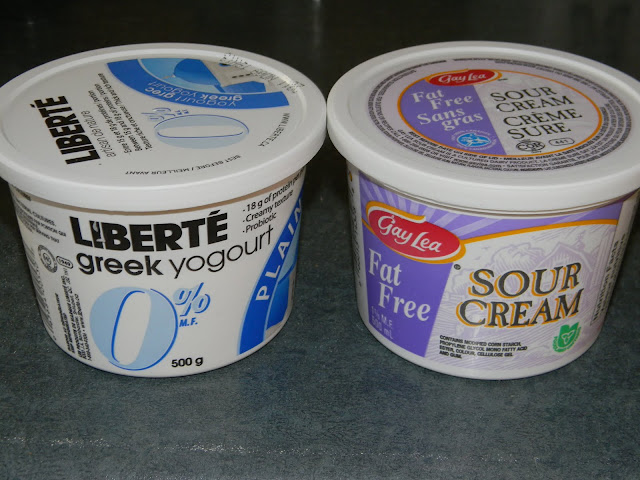
1 cup fat-free sour cream
1/3 cup non-fat greek style plain yogurt
Cook onions with salt and olive oil until they start to brown, 6-10 minutes.
Add beef broth, scraping up brown bits and let simmer until the liquid is almost evaporated, 10-20 minutes.
Reduce heat to medium-low and cook until onions are a deep golden brown 5-8 minutes. Stir in onion powder and vinegar and cook until evaporated 1-2 minutes.
Remove from heat and let cool 20 minutes.
Combine sour cream and yogurt. Stir in onion mixture.
Chill 30 minutes.
Note: Can cover and refrigerate the onion mixture (step 1) for up to 3 days or freeze for up to 2 months.
Yes, in the above picture that is a regular chip. I confess, we had rregular boughten chips with our low fat dip!! Baby steps people. Baby steps.
Friday, October 14, 2011
Apple Coffee Cake

I read this short little history about apples on the Foodland Ontario website and found it quite interesting.
Apples existed as a wild fruit since prehistoric times and have been cultivated for more than 3,000 years. The ancient Greeks, Etruscans, Romans and Egyptians were among its early cultivators.
During the California Gold Rush apples sometimes fetched more than $100 a bushel because of their versatility, durability and capacity to be preserved by drying.
The apple tree now grows (in thousands of varieties) in almost every corner of the globe from Japan to Madagascar to South Africa, New Zealand, Russia, China, England, France and across much of North America.
This got me craving anything apples. Applesauce, apple pie, baked apples, apple streudel, apples and old cheese and just a nice juicy crisp apple all by itself! Since I was short on time I decided on Betty Crockers Apple Coffee Cake and enjoyed munching on apple as I cut them up for the cake. This recipe is so quick and easy it almost makes you feel guilty when people rave about it. Almost.
This cake fills your house with such an amazing aroma. That alone is worth baking it!
Some great apples for baking that hold their shape include Northern Spy (#1), Golden Delicious, Granny Smith, Cortland and Rome Beauty
Apple Coffee Cake
(Printable Recipe)
Streusel Topping
2/3 cup bisquick
2/3 cup packed brown sugar
1 tsp. cinnamon
1/2 tsp. nutmeg
1/4 cup firm butter or margarine
For the cake
2 cups bisquick
2/3 cup milk
3 tbsp. sugar
1 egg
2 medium cooking apples, peeled and sliced
Glaze
1/2 cup icing sugar
2-3 tsp. milk
Heat oven to 400 degrees. Grease a square 9x9x2 inch pan. Make streusel topping by combining bisquick, brown sugar, cinnamon and nutmeg. Cut in butter or margarine with pastry blender until crumbly and set aside.
Stir bisquick, milk, sugar and egg until blended; beat vigorously 30 seconds. Spread half of the batter in pan.

Arrange apple slices on batter.

Sprinkle with half of the streusel topping.

Spread remaining batter over apple slices.

Sprinkle with remaining topping

At this point you can sprinkle with 2 tbsps. chopped nuts. I leave this out due to a peanut allergy in our family. Bake 20-25 minutes or until a toothpick comes out clean when inserted in the center. Cool 20 minutes in pan on wire rack. Drizzle with glaze.
Try and eat just one piece. Yeah, that's what I thought!

Monday, October 10, 2011
Marbled Pumpkin Cheesecake
We love cheesecake in our house. Well, out of our house too, for that matter. So while I did make my usual Pumpkin Pie for Thanksgiving (don't sway from the path) I also made a Marbled Pumpkin Cheesecake. Oh, and some Butter Tarts with the left over pie dough. But back to the cheesecake. I combined a couple of recipes to get the crust and filling I was happy with. So here it is.
Marbled Pumpkin Cheesecake
(Printable Recipe)
Crust-
2 cups graham cracker crumbs
1 tbsp. sugar
1 tsp. cinnamon
5 tbsp. melted butter
Filling-
2-8 oz. pkgs of light cream cheese, softened
3/4 cup sugar, divided
1 tsp. vanilla
3 eggs
1 cup canned pure pumpkin
1 tsp. cinnamon
1/2 tsp. mace
Pre-heat your oven to 350 degrees.
Mix graham cracker crumbs with sugar, cinnamon and melted butter. Press into bottom and up the sides a bit of a 9 inch springform pan. Bake at 350 degrees for 10 minutes. Set aside to cool.
In a medium bowl, mix cream cheese, 1/2 cup of the sugar and vanilla just until smooth.
Mix in eggs one at a time blending well after each addition.
Set aside 1 cup of this mixture.
Then add the other 1/4 cup sugar, pumpkin, cinnamon and mace.
Spread the pumpkin flavoured batter over the graham crumb base. Drop the plain batter by spoonfuls onto the the top of the pumpkin layer. Swirl with a knife to create a marbled effect. Bake at 350 degrees for 55 minutes or until filling is set. Run a knife around the edge of pan after removing from the oven. Allow to cool in the pan. Chill at least 4 hours.
Marbled Pumpkin Cheesecake
(Printable Recipe)
Crust-
2 cups graham cracker crumbs
1 tbsp. sugar
1 tsp. cinnamon
5 tbsp. melted butter
Filling-
2-8 oz. pkgs of light cream cheese, softened
3/4 cup sugar, divided
1 tsp. vanilla
3 eggs
1 cup canned pure pumpkin
1 tsp. cinnamon
1/2 tsp. mace
Pre-heat your oven to 350 degrees.
Mix graham cracker crumbs with sugar, cinnamon and melted butter. Press into bottom and up the sides a bit of a 9 inch springform pan. Bake at 350 degrees for 10 minutes. Set aside to cool.
In a medium bowl, mix cream cheese, 1/2 cup of the sugar and vanilla just until smooth.
Set aside 1 cup of this mixture.
Then add the other 1/4 cup sugar, pumpkin, cinnamon and mace.
Spread the pumpkin flavoured batter over the graham crumb base. Drop the plain batter by spoonfuls onto the the top of the pumpkin layer. Swirl with a knife to create a marbled effect. Bake at 350 degrees for 55 minutes or until filling is set. Run a knife around the edge of pan after removing from the oven. Allow to cool in the pan. Chill at least 4 hours.
Tuesday, October 4, 2011
Pumpkin Ravioli with Brown Butter and Sage

It's fall and a great time to cook with pumpkin. Actually anytime is a great time to cook with pumpkin. I always keep a few cans of pumpkin puree in my cupboard. Yesterday I made pumpkin ravioli with brown butter and sage. This is a great fall comfort food and elegant enough to serve guests. It is so light tasting with the fresh pasta that I could in fact eat the whole batch myself and have on occasion come close to doing so. But come on, anything with melted butter on it has to be great. Right?
Start with the pasta dough. You can always use wonton wrappers you buy at the grocery store, but homemade pasta dough is pretty simple. I use a mix of semolina and all purpose flour as I just like the texture it gives.
Pasta Dough
1 1/2 cups all purpose flour
1 1/2 cups semolina flour
4 large eggs
2 tbsp. water
1 tsp. olive oil
In a large stand mixer mix all ingredients with dough hook until it comes together. Turn out onto floured board and knead a few times to form a smooth ball. Cover with plastic wrap and let rest at room temperature for 15-20 minutes.
Pumpkin Filling
1 cup pumpkin puree
1 cup ricotta cheese
1 egg
1/2 cup grated parmesan cheese
1/4 tsp. nutmeg
salt and pepper
Mix all ingredients together and set aside or refrigerate until your pasta dough is made.

Roll pasta dough into long strips. Place about 1 tablespoon of filling 1 inch apart along first strip of rolled pasta dough.

Gently top with next strip.

Press out air around each ravioli sealing as you go. Then using a sharp knife, ravioli cutter or even pizza cutter, cut out the ravioli.
If using wonton wrappers. Work with a few at a time keeping the rest covered with a damp towel so they don't dry out. Place same amount of filling in the center of each brush edges with water and top with another wonton wrapper pressing out air to seal.

Place on parchment lined baking sheets dusted with semolina flour and cover with plastic wrap.

Repeat until all ravioli is made. You can refrigerate at this point until ready to cook.
To prepare, bring large pot of water to a boil. Add ravioli and once they float to the top cook another couple of minutes, drain and gently toss with brown butter and sage (recipe follows).
Brown Butter and Sage
1/2 cup butter
2 tbsp. olive oil
bunch of sage leaves (I used about 10)
Heat butter and oil until butter starts to turn brown. Add sage leaves and cook another couple of minutes. Toss with pasta.
(Printable Recipe)
Saturday, October 1, 2011
Garlic Confit

I came across this recipe in my October issue of Food and Wine Magazine. I absolutely love all things garlic. I always have lots and lots of garlic in my kitchen as I use it everyday. I put it in everything(okay almost everything)I cook. We also have it quite often on roasted or in oil on bread, so I thought this was just a great idea to have on hand and super easy, too!
All you need is
(Printable Recipe)
6 heads of garlic, cloves separated and peeled
6 thyme sprigs
3 small bay leaves
3 dried red chilis
2 cups pure olive oil
Throw it all in a pot and simmer over low heat until the garlic is soft and tender, but not browned.

This takes about 30 minutes. Then use a slotted spoon to transfer the garlic, chilis and herbs into a canning jar and pour the cooking oil over top. Seal and refrigerate for up to 4 months. You can mash this into butter for a spread, mash into potatoes or use in roast chicken.
I will now always have a jar of this "garlic confit" in my fridge!
Subscribe to:
Comments (Atom)


